AM Material Certification Database Cuts Redundant Testing
UL’s Blue Card program provides a reliable, transferrable set of test results for plastic materials used in additive manufacturing — so long as the user’s printing parameters match the tested parameters.
Share
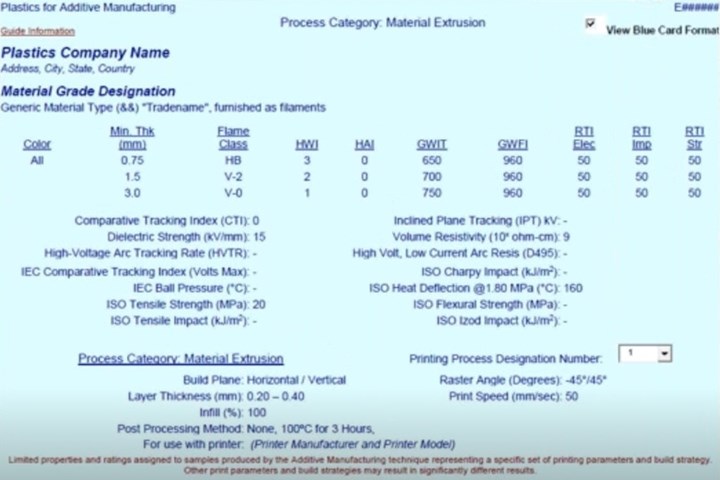
UL’s Blue Cards track a wide variety of performance data for plastics used in additive manufacturing. As build parameters can actually alter final performance data, the data on these cards is only transferable under specific circumstances. All images are captured from a webinar UL conducted with us on December 1, 2020.
Photo Credit: UL (Underwriters Laboratories)
One of additive manufacturing’s many benefits is the efficiency gain that comes with it. Total production lead time is often faster, tooling is non-existent, and AM’s distributed on-demand nature enables manufacturers to operate without much warehouse space.
Testing, however, remains a large problem for bringing AM products to market. AM materials’ properties can change in response to different build parameters, and the wide variety of parameters within even a single process family makes recognition difficult — at least, without coordination between printer and material manufacturers.
Underwriter Laboratories’ (UL) Blue Card system provides a common recognition method for certifying printer and material manufacturers. UL’s standardized tests show how particular materials should respond in different applications, removing the need for manufacturers to perform redundant tests. Manufacturers can instead perform direct material comparisons to see how short-term properties change with a material substitution.
Why should a printer or material manufacturer turn to UL rather than reporting statistics themselves? Quite simply, as UL senior staff engineer and distinguished member of technical staff Kenneth R. Vessey Jr. explained in a webinar with Additive Manufacturing, self-declarations aren’t always trustworthy — and government mandates for certifications refuse to recognize self-declarations for this reason. UL has had a proven track record for measuring plastics performance in the US since the 1960’s, and thus serves as a nationally recognized certifier. Several parts of the EU also recognize UL certifications.
Pre-selection testing provides reproducible results which should prove consistent between laboratories. Designers and product manufacturers can consult these results early in their processes to reject unsuitable materials and narrow material selection without spending money themselves on tests. This results in faster qualification of final materials, a reduction in necessary end-product testing and a faster time to market.
Where to Find UL-Certified Materials?
The UL Product iQ database provides interested parties with information on UL-certified materials. This free database contains about 50,000 certified plastics in the Yellow Card system for conventional manufacturing methods, and a submenu that provides data for certified additive manufacturing materials in the Blue Card system — at the time of the webinar, UL had certified 30 different additive manufacturing materials.
While the two systems are both valuable, they are not directly transferrable. In a study comparing the properties of injection molded parts to 3D printed parts made through material extrusion AM processes, injection molding proved more consistent and outperformed all 3D printed builds in most parameters. Even among the 3D printed parts, the industrial-grade printer achieved more consistent quality than the consumer-grade printer, and different build settings with the same material on the same printer yielded critically different performances.
With that caveat, Vessey points out one area where Blue Card knowledge can assist users of conventional manufacturing. He notes that if a prototype part made through AM meets the user’s specifications, the better-performing injection molded part will certainly do the same.
Measuring for the Blue Card
Material performance recorded on the Blue Card is based on the minimum exposed thickness of a test specimen. In most cases, this will be the contour — fully encased parts use the thickness of the contour “skin,” while partially encased and un-encased parts simply use the thickness of the infill wall or contour skin (whichever is thinner). This is because thin areas of parts are the most likely to fall short in an ignition test or to serve as a safety-critical barrier. If the material succeeds in tests at this point, it is almost certain to succeed in other areas and geometries.
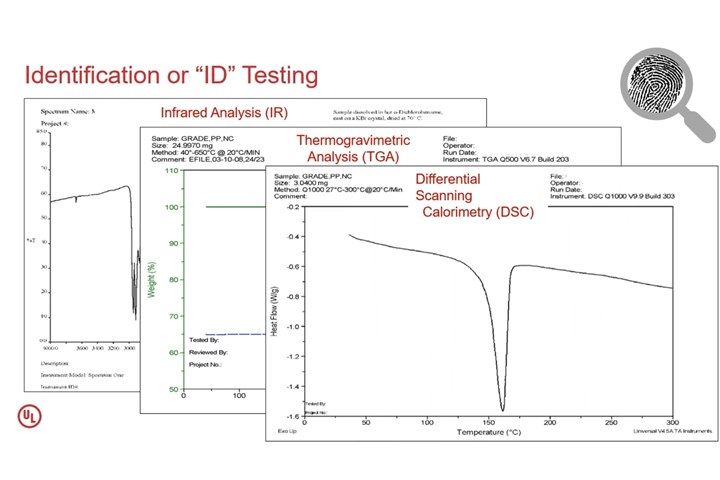
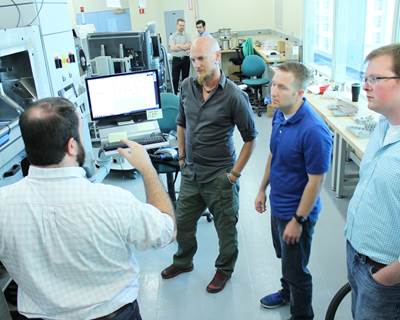
To maintain customer confidence and its own certification, UL performs follow-up testing, visiting material and printer manufacturers to retest samples. Sample charts for three of the most important tests in the identification testing battery are shown in the photo: qualitative infrared analysis (IR), thermogravimetric analysis (TGA) and differential scanning calorimetry (DSC).
Photo Credit: UL (Underwriters Laboratories)
Judging where Blue Card data is transferrable (that is, usable outside of one process on one machine with one set of build parameters) requires consideration of equipment parameters. The minimum and maximum layer thicknesses, printer mechanism, print speed, orientations, post processing, chamber temperature and material preparation method all must be the same — currently, this also means that transferability is limited to equipment from the same manufacturer. Build volume is the one parameter that can change, as the size of the build area does not determine the final part’s physical properties.
As of December 2020, UL can test materials used for fused filament fabrication, granulate material extrusion, continuous filament fabrication, paste extrusion modeling, stereolithography, digital light processing, binder jet fusion, laser sintering and material jetting. The certifier is continuing to expand the range of AM technologies applicable to its tests, thus building a knowledge center for manufacturers looking to save time on material decisions and testing for AM designs.
Continued Assurances
UL verifies continued compliance through UL follow-up service testing — a process in which UL visits manufacturers and selects samples to retest. This process involves another flammability test at the minimum thickness of a part, as well as extensive identification testing that includes qualitative infrared analysis (IR), thermogravimetric analysis (TGA), differential scanning calorimetry (DSC), pyrolytic gas chromatography (GC), density (DEN) testing, x-ray florescence (XRF) testing for ROHS (restricted or hazardous substances), gas chromatography-mass spectrometry (GC-MC) for phthalates and combustion-ion chromatography (CIC) for non-halogens.
The certifier’s fabricated parts program (QMMY2) verifies compliance with molders and processors to ensure traceability for the material and guarantee that the originally evaluated material is unaltered for the end product. This program does not require testing in most cases, but UL can obtain samples for identification testing in unclear cases. Another program checks the end parts themselves, with a UL inspector going into retailers and purchasing UL-labeled parts to perform identification testing against them.
Related Content
ActivArmor Casts and Splints Are Shifting to Point-of-Care 3D Printing
ActivArmor offers individualized, 3D printed casts and splints for various diagnoses. The company is in the process of shifting to point-of-care printing and aims to promote positive healing outcomes and improved hygienics with customized support devices.
Read MoreHow Large-Format 3D Printing Supports Micro-Scale Hydropower
There is potential hydroelectric power that has never been unlocked because of the difficulty in capturing it. At Cadens, additive manufacturing is the key to customizing micro-scale water turbine systems to generate electricity from smaller dams and waterways.
Read MoreHow to Build 10,000+ Shot Molds in Hours
Rapid tooling isn’t so rapid when it takes days to 3D print a metal mold, and then you still must machine it to reach the necessary tolerances. With Nexa3D’s polymer process you can print a mold in hours that is prototype or production ready and can last for more than 10,000 shots.
Read More3D Printing with Plastic Pellets – What You Need to Know
A few 3D printers today are capable of working directly with resin pellets for feedstock. That brings extreme flexibility in material options, but also requires greater knowledge of how to best process any given resin. Here’s how FGF machine maker JuggerBot 3D addresses both the printing technology and the process know-how.
Read MoreRead Next
4 Ways the Education and Training Challenge Is Different for Additive Manufacturing
The advance of additive manufacturing means we need more professionals educated in AM technology.
Read More3D Printing Brings Sustainability, Accessibility to Glass Manufacturing
Australian startup Maple Glass Printing has developed a process for extruding glass into artwork, lab implements and architectural elements. Along the way, the company has also found more efficient ways of recycling this material.
Read MoreHybrid Additive Manufacturing Machine Tools Continue to Make Gains (Includes Video)
The hybrid machine tool is an idea that continues to advance. Two important developments of recent years expand the possibilities for this platform.
Read More





.png;maxWidth=300;quality=90)

